Perform Passtime Actions
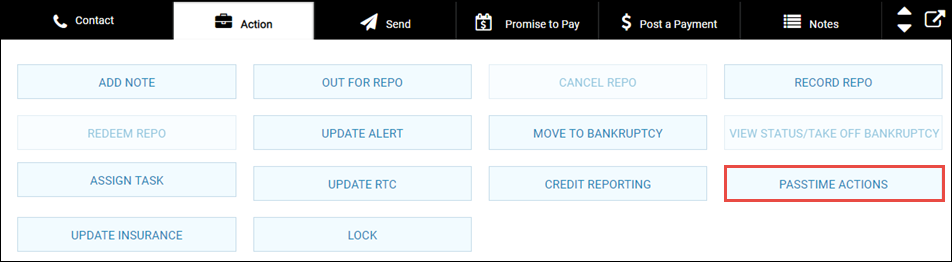
If an account is connected to a Passtime device, the Action menu in the bottom navigation pane displays the Passtime Actions button instead of the Payment/GPS Device button. You can enter GPS device information from the Collateral tab > Payment GPS sub-tab. You cannot add it by clicking Passtime Actions in the bottom navigation pane. If a vehicle has starter interrupt, you can generate codes from the system when the customer makes a payment. You can also send warning codes. IDMS has intelligent tasking for GPS devices, where you can automatically run tasks specific to these devices.
To add or change Passtime device information for an account
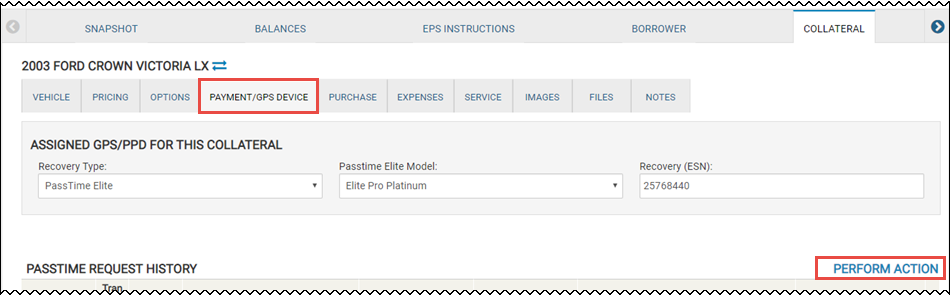
- From the Collateral tab on the Account page, click the Payment/GPS Device sub-tab.
If a Passtime device is already associated with the account, the Recovery Type field shows the Passtime device and the Recovery (ESN) field shows the unique number assigned to the device. Passtime Elite also has a model.
- Complete the fields or make any changes, and click the Save icon
 .
.
- Click Perform Action.
The Action tab opens on the bottom navigation pane. See the next section to perform actions from the bottom navigation pane.
To perform Passtime actions in accounts
Passtime actions may include doing a locator, enabling the device, or sending a tone, for example.
- From the Account page, click the Action menu in the bottom navigation pane and click Passtime Actions.
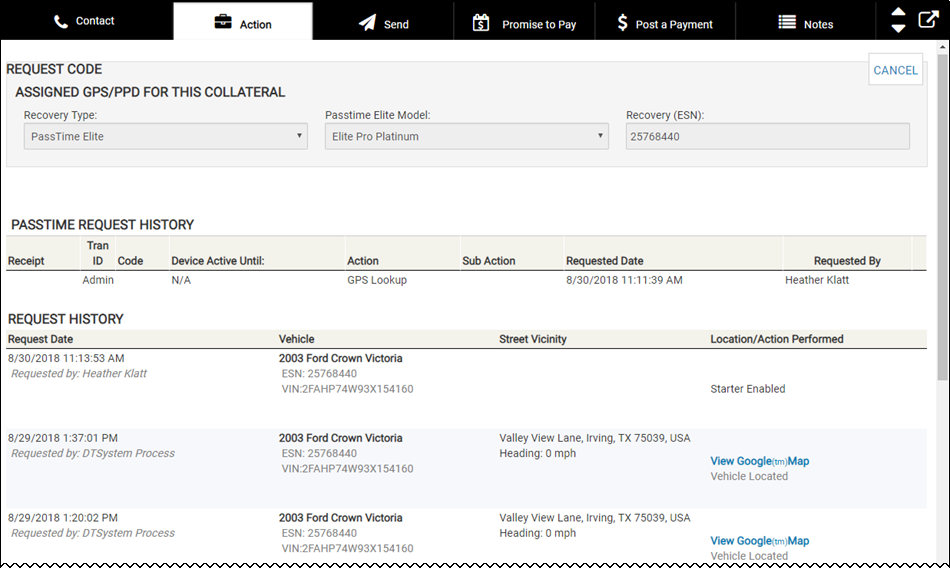
The Request Code section opens.

- Choose the appropriate option from the drop-down list.
- If you chose Reset Code, then choose the SelectedFunction.
- Click Confirm.
- If applicable, click GPS Lookup to do a locator.
The GPS Lookup pop-up window opens.
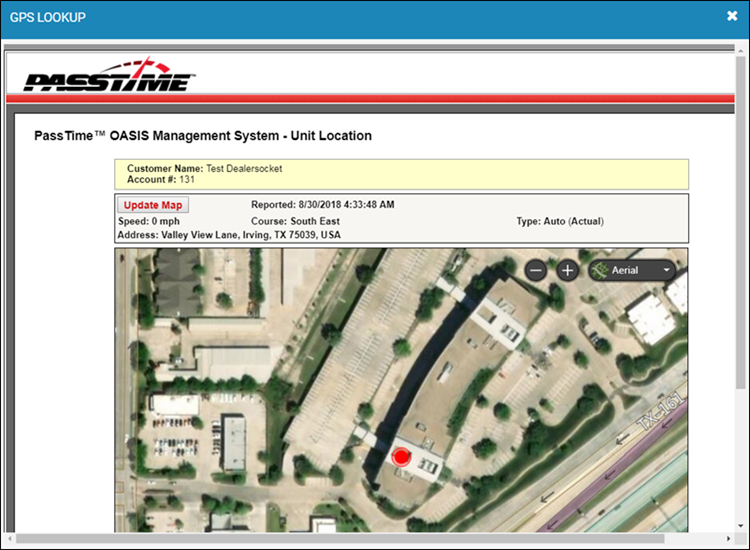
- Close the window.
The request history displays in the Action tab.