View or Edit a Portfolio
- From the left navigation pane, click the Settings icon
 and choose Portfolios.
The Portfolio List page opens a list of portfolios.
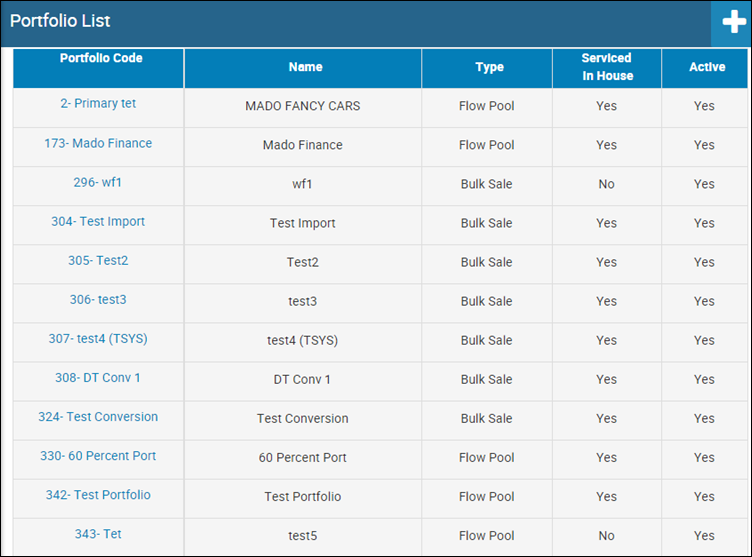
- Choose the portfolio you want to view or edit by clicking the link in the Portfolio Code column.
The Portfolio Editor page opens the Detail tab by default.
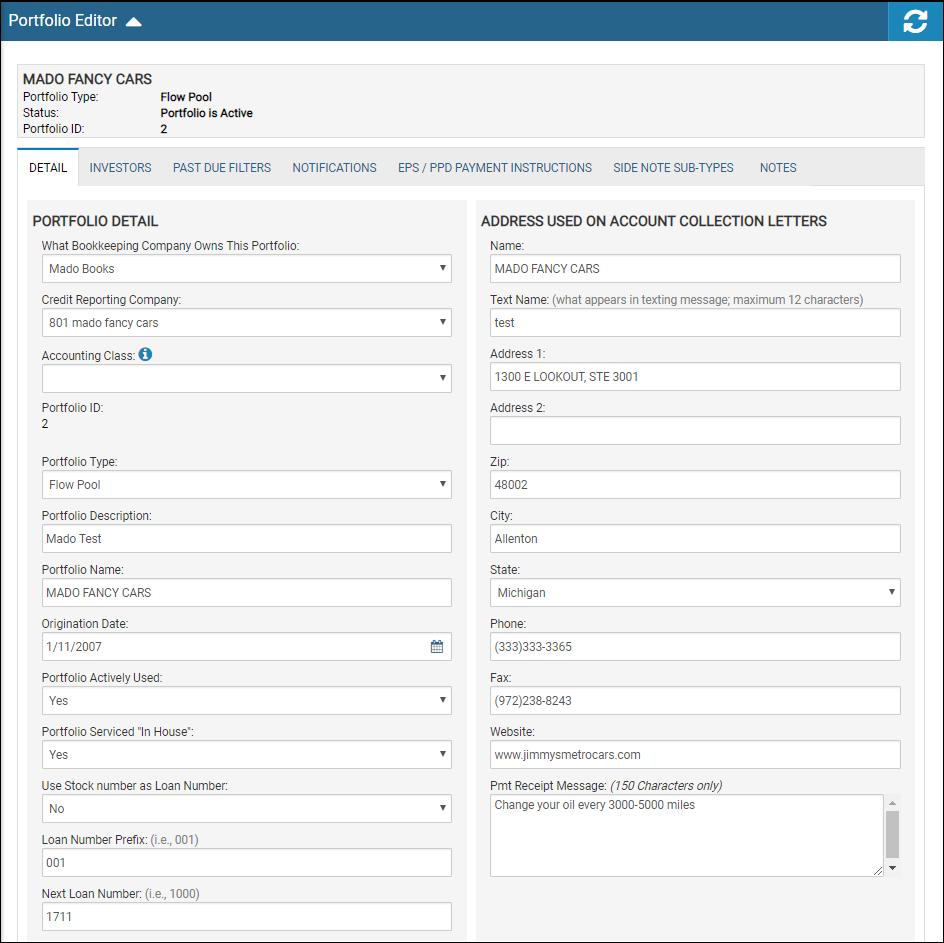
- Edit portfolio details and addresses used on account collection letters, and click the Save icon
 .
.
Investors
- Click the Investors tab.
The Portfolio Investors section displays.
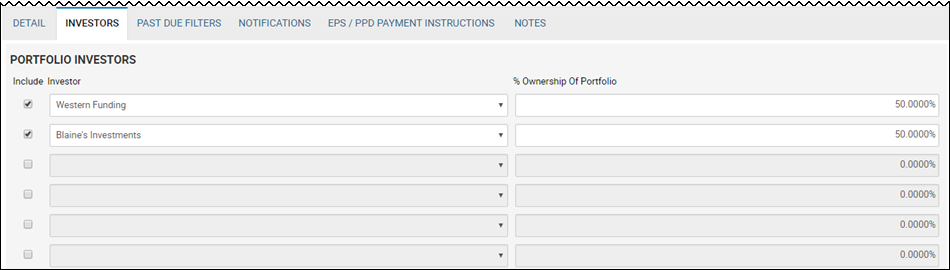
- Edit investor fields, and click the Save icon.
Past Due Filters
- Click the Past Due Filters tab.
The fields enable you to configure how account past dues are monitored.
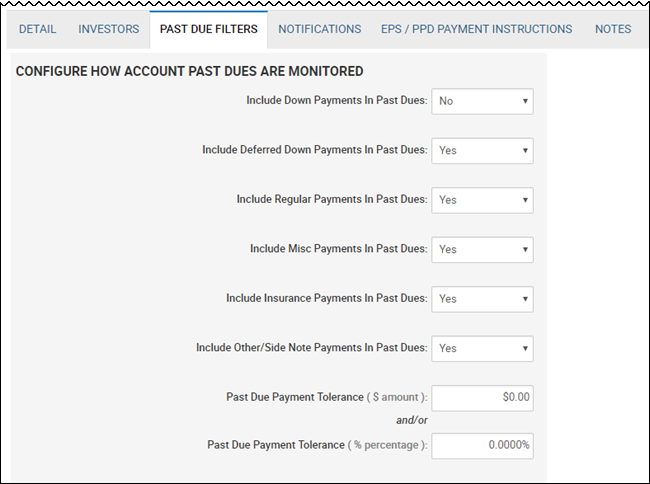
- Edit the fields, and click the Save icon.
Notifications
- Click the Notifications tab.
The fields enable you to set automatic letter generations for situations such as past dues or bill reminders.

- Edit the fields, and click the Save icon.
EPS/PPD Payment Instructions
From this tab, you can globally set up parameters for payment types, among other tasks. EPS allows the dealer to take payments three different ways: Auto payment which sets up an auto scheduler for their regularly scheduled payment, one time payments in the dealership, or online payments. Each payment type also has a status of current account, past due, and charged off. You can set a convenience fee, require minimum payments due, allow payments to be scheduled into the future, and more.
The EPS/PPD Payment Instructions tab is also used to set NSF fee defaults, as well as suspend and return settings, use Customized Payment Allocation, enable stacked PTPs, and designate Passtime Settings.
- Click the EPS/PPD Payment Instructions tab.
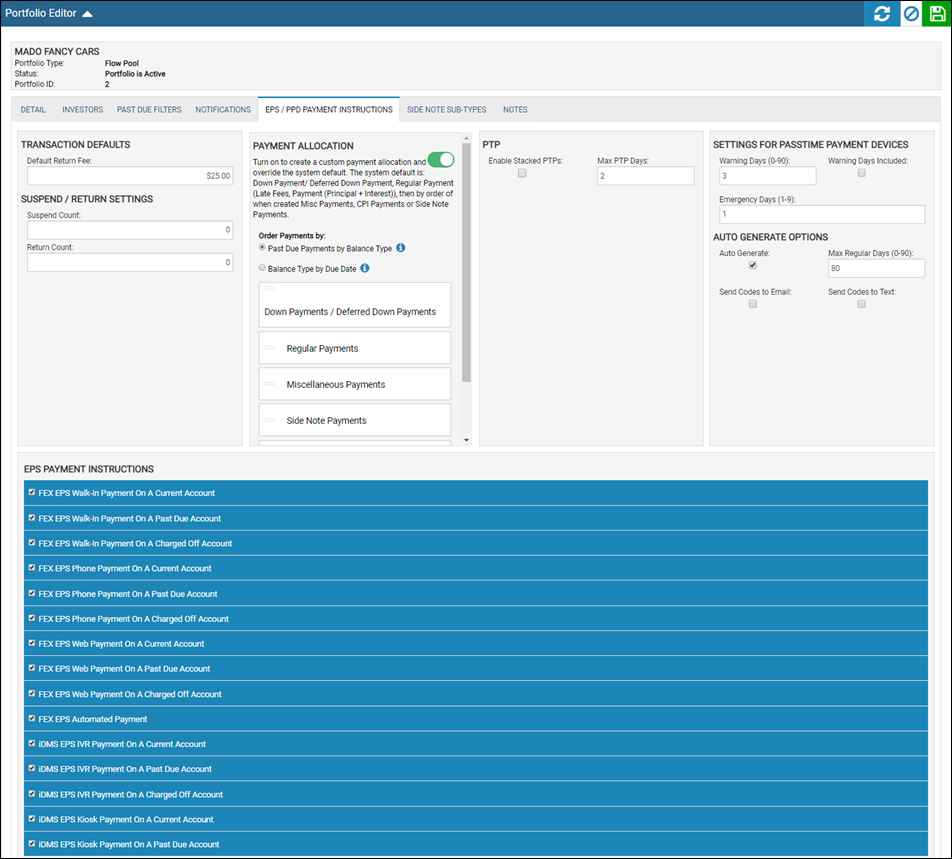
- Choose a category in the EPS Payment Instructions section to open more details.

- Edit EPS payment instructions, and click the Save icon.
Customized Payment Allocation
From the EPS/PPD Payment Instructions tab, administrators can override the default payment allocation and specify which balances get paid first at the Portfolio level. A drag and drop function makes it easy to rearrange payments in the order you want them applied. Drag the payment type to the top to set it first, then the next underneath is second, and so on. When a payment is posted on an account, the order designated here is reflected in the snapshot.
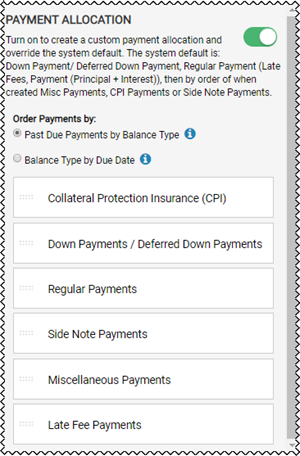
Toggle the on switch ![]() to enable the allocation. Click the tool tips icon
to enable the allocation. Click the tool tips icon ![]() to learn about the different payment allocation methods.
to learn about the different payment allocation methods.
Passtime Settings
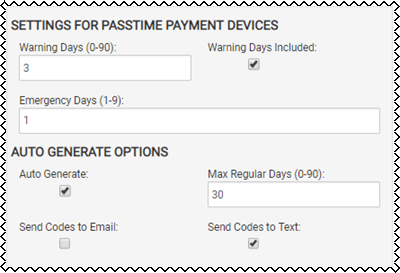
When completed, the Warning Days field indicates how many days ahead the dealer wants to send a warning signal to their customers to remind them that their payment due date is coming up. Check the Warning Days Included box to include the warning days in the regular days, essentially extending the regular days.
Customers get a code they can enter in emergencies. The Emergency Days field determines how many days that code will work for. When customers do not make their payment, the vehicle shuts off. They enter the emergency code, and the vehicle will work for the number of days the Emergency Days field is set to.
Click the Auto Generate box to designate that when account becomes current on a regular payment, the code is sent automatically to the unit to enable it. The Max Regular Days field indicates the number of days during which the vehicle will operate normally before entering the customer reminder or warning period.
The Send Codes check boxes are used when the dealers want to send the codes via text or via email to their customers.
Side Note Sub-Types
Dealers can set up their own custom side note sub-type, and control the accounting for these custom side notes, which add a second level of detail.
- Click the Side Note Sub-Types tab.
Existing sub-types are listed and indicate whether the side note sub-type is recurring and active.
- Click Add.
The Add/Edit Side Note Type pop-up window opens.
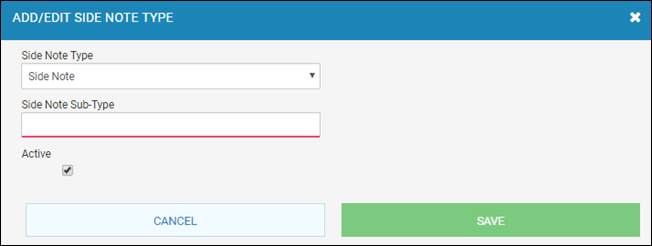
- In the Side Note Type field, choose Side Note or CPI Balance.
- Type the Side Note Sub-Type name, such as Repairs.
- Check the Active box to ensure the side note appears in the drop-down list when creating a side note.
- Click Save.