Managing Bins
Add an account to the bin so that the customer is automatically emailed, texted, transferred, or called under certain terms. These are automated tasks that go into the dialer. For example, all customers are called when their account is going past due.
From the left navigation pane, click the Tasking icon ![]() and choose Bin Maintenance.
and choose Bin Maintenance.
The Bin Maintenance page opens.
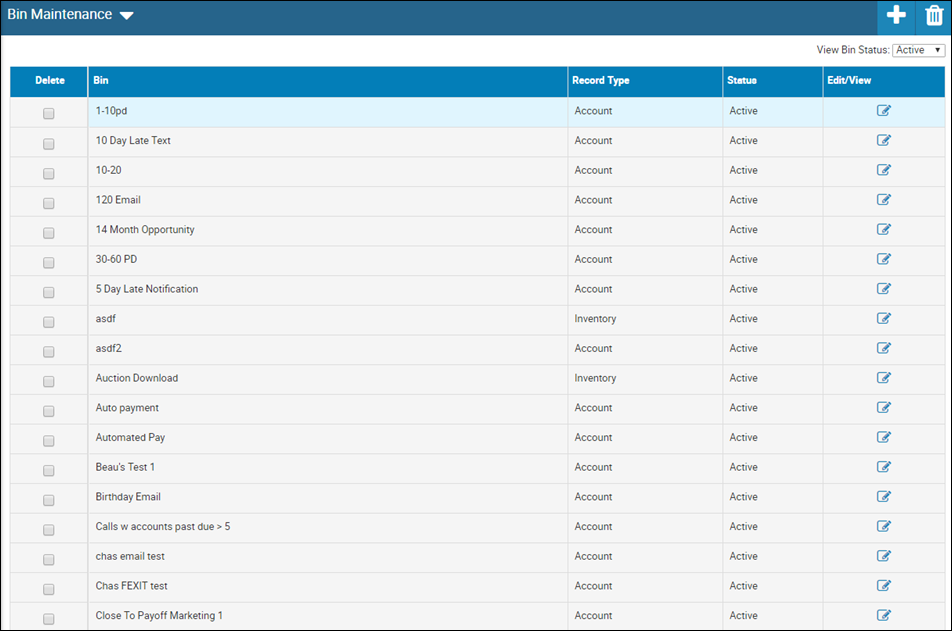
Change the list results by selecting a new status, such as deleted bins, in the View Bin Status field.
To edit or view records in an existing bin
Click Edit/View Selected Records.
The Bin Edit page opens and lists the records that are currently included in the bin you selected.
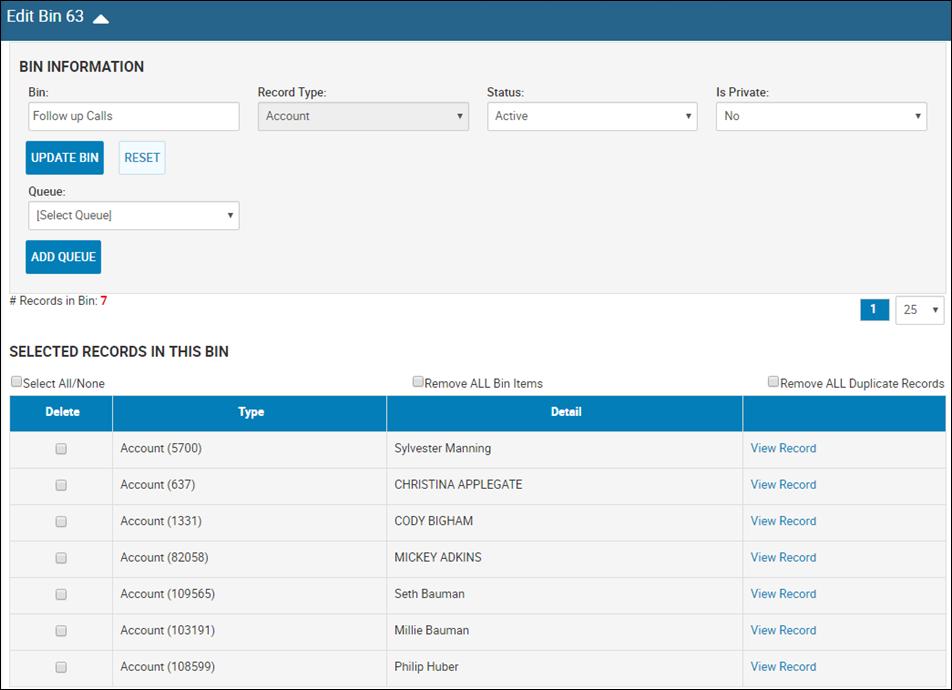
Options on the window include:
- Edit fields in the Bin Information section as needed.
- Add or change the queue you want the bin in, and click Add Queue.
- Check the Select All/None box to select or deselect all records in the bin.
- Check the Remove All Bin Items box.
- Check the Remove All Duplicate Records box to remove any duplicate records that are included in the bin.
- Click View Record to open the Account page for a specific account.
To delete a bin
- In the Delete column, check the boxes that you want to delete.
- Click the Delete icon
 .
.
You receive a confirmation pop-up message.
- Click Yes.
To add a new bin
- Click the Add icon
 .
.
The New Bin Item page opens.

- Complete the fields, and click Update Bin.