Edit the Buyers Guide in a Deal
A warranty automatically appears on the deal Worksheet if the Buyers Guide associated with the vehicle is set to Warranty and not As-Is. Add a warranty from the After Market tab in the Worksheet where you add the After Market information in the deal. In order to add a warranty on the vehicle, you must edit the buyers guide. If there is already a warranty on the vehicle, you can edit the buyers guide in the deal by clicking the View icon ![]() .
.
To add a warranty
- From the Worksheet, click the After Market tab.
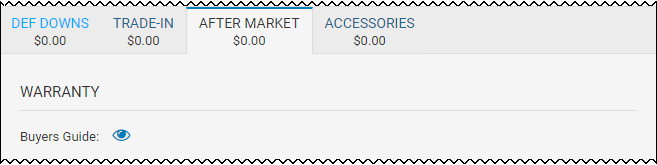
Vehicles with no warranty added appear as below, which means the vehicle comes As-Is.
- Click the Edit icon
 where the vehicle information is listed, as shown.

The Inventory page opens in another browser.
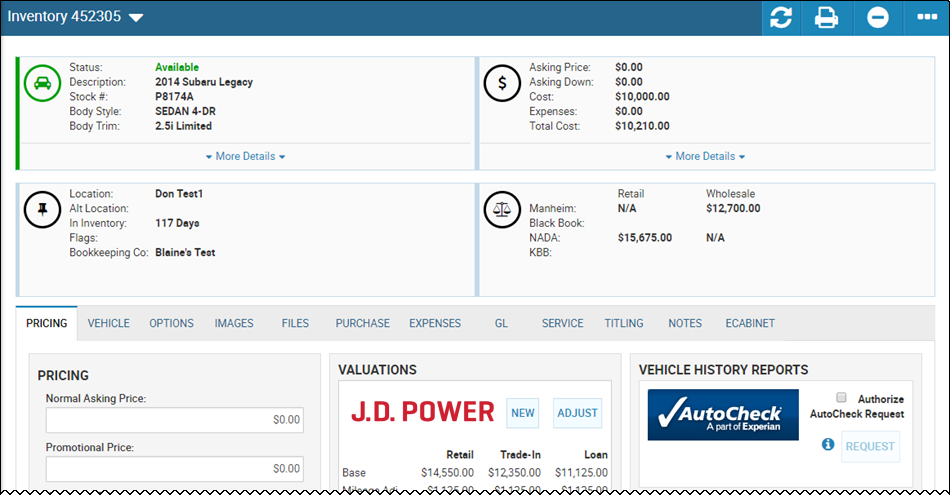
- Click the More icon
 , and choose Edit Buyers Guide.
The Edit Buyers Guide pop-up window opens.
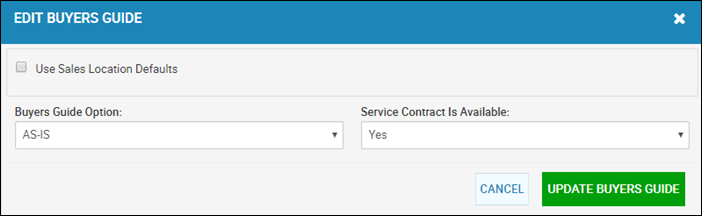
- Click the Buyers Guide Option arrow, and choose Warranty.
New fields appear.
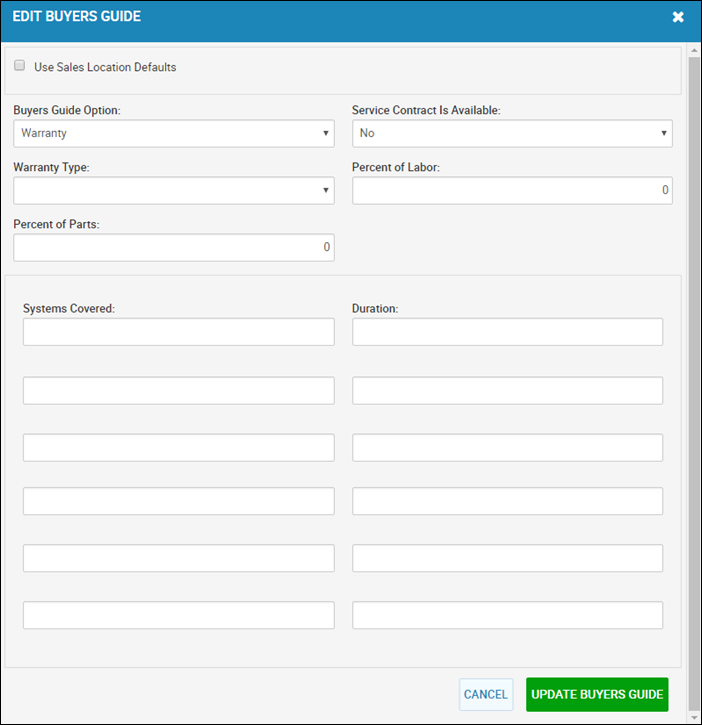
- Complete the fields, and click Update Buyers Guide.
- Go back to the Worksheet, and click Apply to apply the changes to the warranty.
New fields appear.
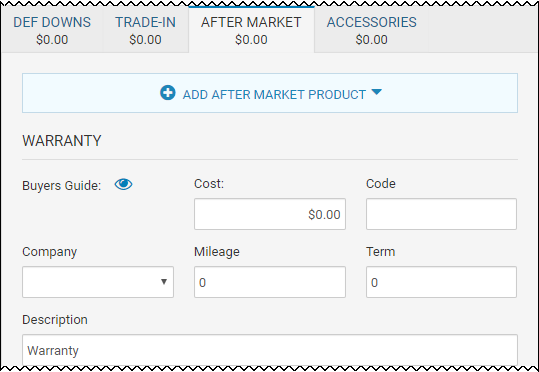
- Complete any fields, or add the cost that you are incurring for adding the warranty to the vehicle.
- Now, you can click the View icon
 to edit the buyers guide in the Worksheet.