Create a Lender Finance Worksheet
While creating a worksheet, you can choose the Lender Finance Worksheet type. This topic details how to do so. When using RouteOne, you must first add RouteOne lenders to choose from. For LenderSocket, refer to the Set Up LenderSocket page. This also works with the Dealertrack and CUDL integrations.
This video provides an overview of LenderSocket integrations in IDMS.
To create a Lender Finance worksheet
- Add a retail deal, filling out all the applicant information and pulling credit.
- Click Create a Worksheet, and choose the vehicle as usual.
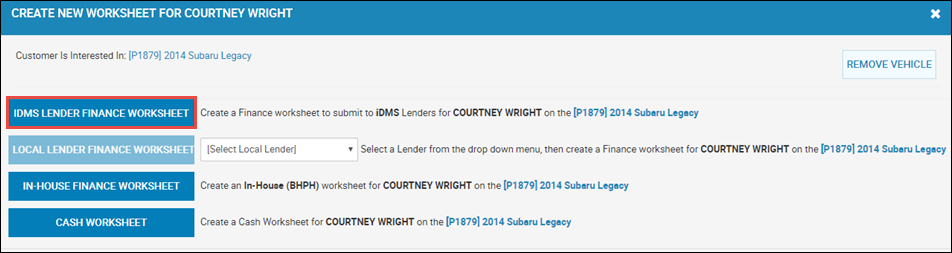
- On the Create New Worksheet pop-up window, choose Lender Finance Worksheet.
The Worksheet opens, where you can choose your lender.
- First, complete the worksheet information as usual.
- Click the More icon
 , and choose Find Lenders.
The Find Lenders pop-up window opens and displays a list of lenders you are connected with.
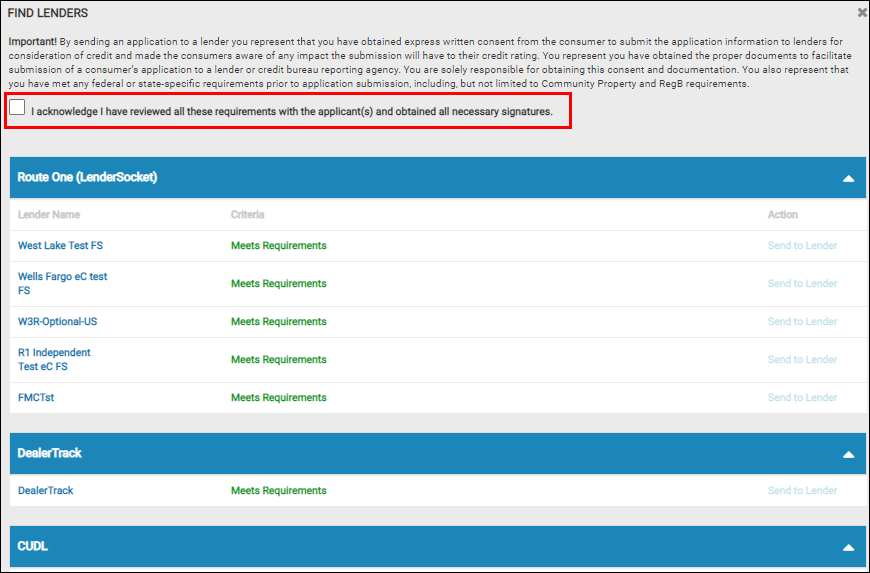
- Check the box acknowledging you have reviewed all the requirements with the applicants along with obtaining the necessary signatures.
-
Choose the lenders for the worksheet, clicking Send to Lender for each.
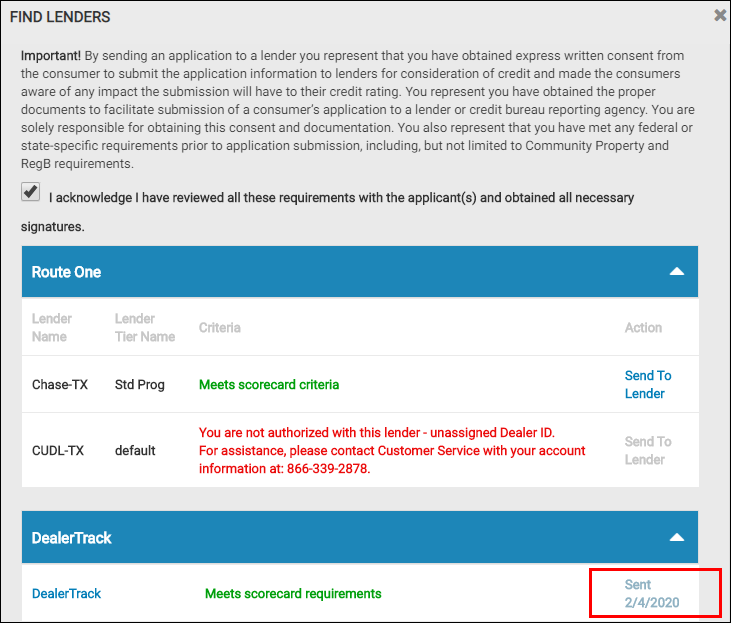
The Find Lenders pop-up window opens with the date sent to the lender.
- Click Close.
The system creates a worksheet for each one, which you can view on the Worksheets tab.
- Open the worksheet you want to work with by clicking the View icon
 .
. - Scroll to the Lender Decision section, and you can view the notes retrieved by RouteOne, Dealertrack, or LenderSocket.
- Click the More icon, and choose Decision.
The Worksheet Decision pop-up window opens.
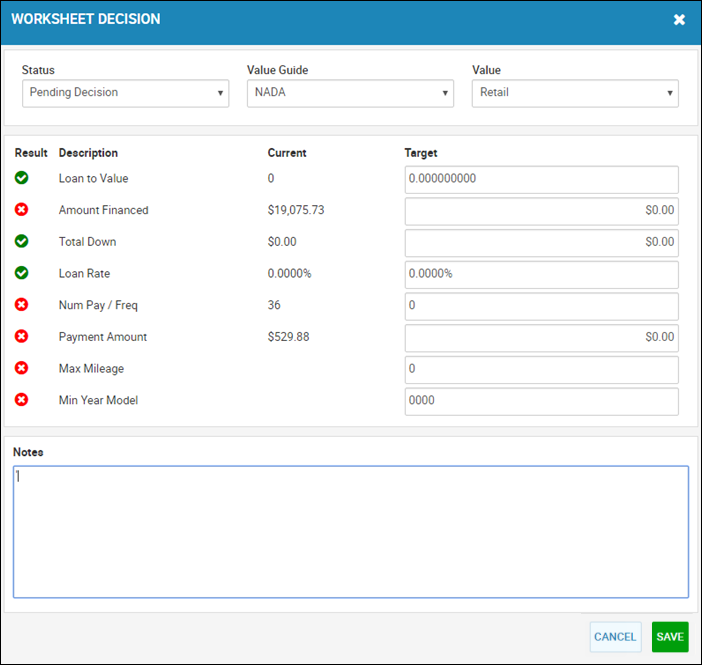
- If the Status is Approved, or the lender ends up approving it and you choose Approved in the Status field, click Save and you can contract and book the deal.