Create a Worksheet
In Deals, you can create a worksheet to calculate payments for a new deal. The worksheet is the deal structure page, where you work with the customer to structure the deal according to parameters from the bank or requests from the customer, such as monthly payment and down payment. You can save the worksheet and come back to it later to edit it and recalculate as needed.
This video provides an overview of deal worksheets in IDMS.
- From the Deal page, click the Worksheets tab.
A list of worksheets appears if there are existing ones for this deal.

- Click Create a New Worksheet.
The Create New Worksheet pop-up window opens.
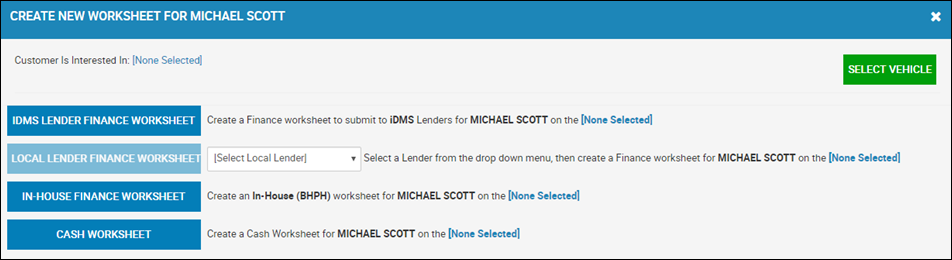
- Click Select Vehicle to locate the vehicle you are creating the worksheet for.
Search fields appear.
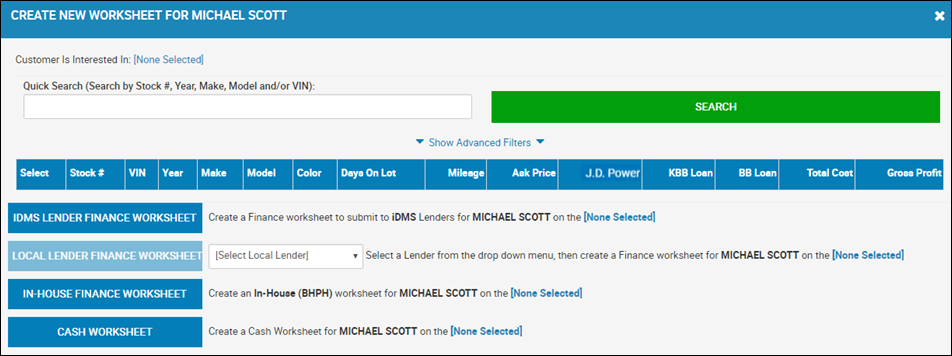
- Enter or select search criteria, and click Search.
A list of vehicles matching your search criteria appears.
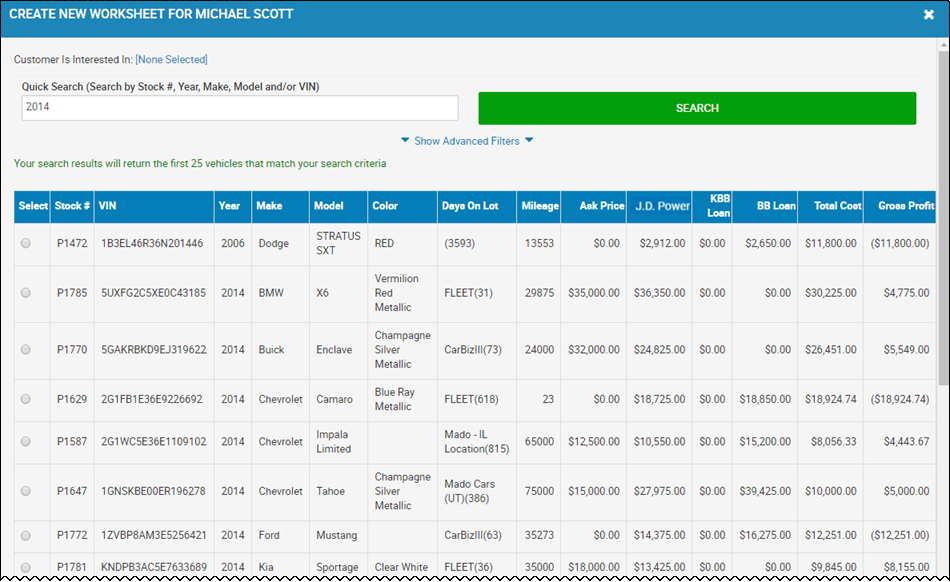
- Locate the vehicle you want to add a worksheet for, and click the Select option.
- Choose the worksheet type, such as cash, in house financing, or outside financing.
The Details sub-tab opens by default. The top section and right side of the page remain no matter what sub-tab you are on. Unavailable fields are green and system-fill. When you enter or change any field information, those fields turn orange, indicating you must click the Calculate icon ![]() before the fields are accurate.
before the fields are accurate.
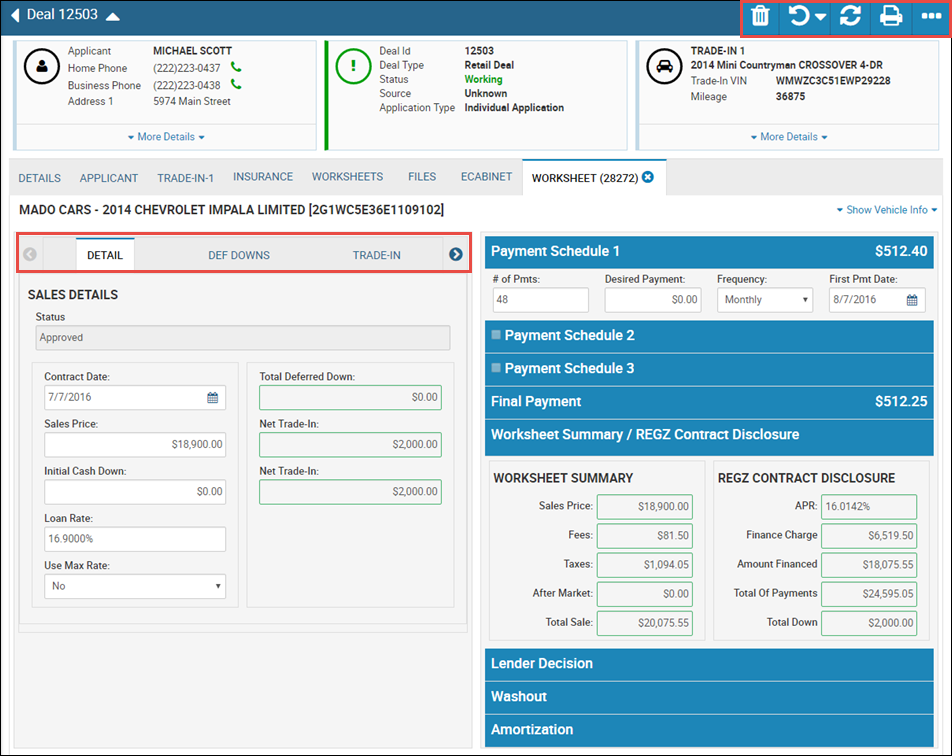
- Complete the Sales Details section with appropriate information, such as date, sales price, down payment, and interest rate. See below for other tab explanations.
- Use the Payment Schedules to enter the number of payments, how much the customer wants the payment to be and how often, as well as the first payment date.
- If applicable, click the Lender Decision accordion to view decisioning information.
-
If applicable, click the Washout accordion to access view-only information that analyzes how the numbers are worked out.
-
If applicable, click the Amortization accordion to access the view-only amortization scheduled based on the numbers you have entered.
To View a Deals Worksheet Summary
See also:
Add a Trade-In