Post an Electronic Payment
You can post a payment from several locations in IDMS. The Post Payment section in the bottom navigation area opens from any of the following:
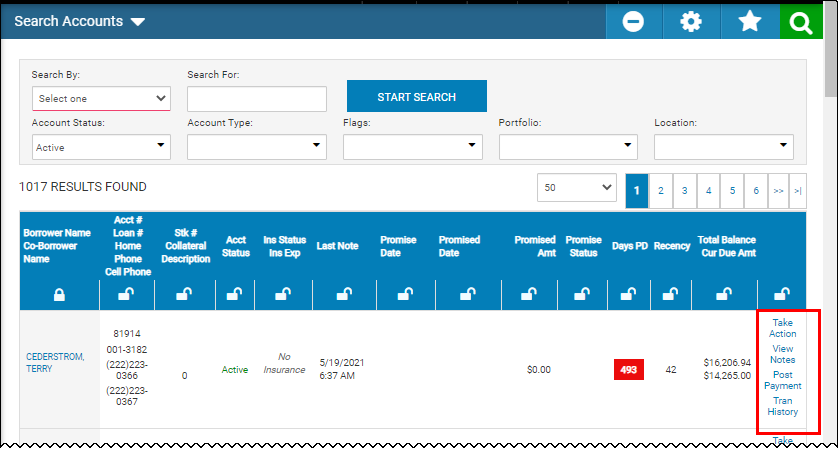
- From the Search Customers page, locate the account and click the Post Payment link without first opening the borrower's account.
- From the Account page, click the Transactions icon
 at the top of the page and choose Post a Payment.
 - From the bottom navigation bar on the Accounts page, click Post a Payment.
- From the bottom navigation bar on the Deals page of a booked and contracted deal, click Post a Payment. This includes down payments. They are taken the same way a regular payment is taken.
- From the bottom navigation bar in Accounts or Deals, if the result of making contact with a customer is Received Payment, the Post a Payment section in the bottom navigation automatically opens. See Make a Phone Call or Document a Received Phone Call.
This video provides an overview of creating a FEX online payment account in IDMS.
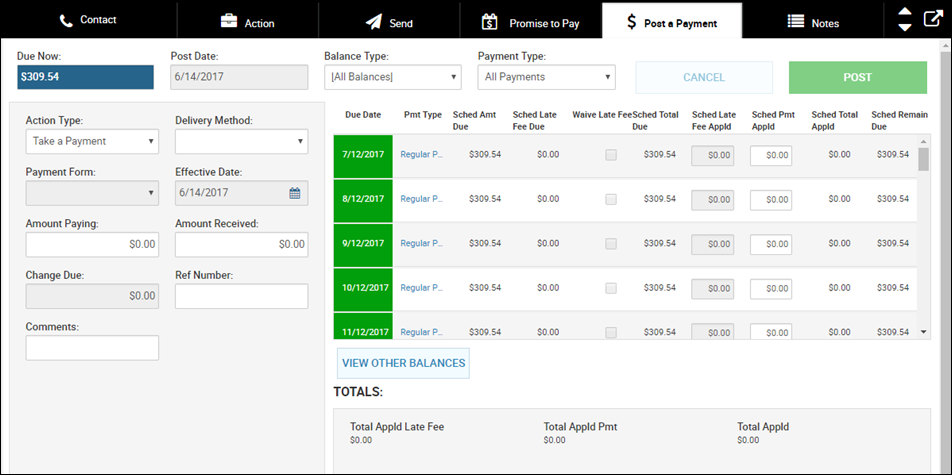
See Post a Payment if the payment form is anything besides EPS. Complete the following steps for EPS payments.
Any alerts on the account will appear in the Post a Payment area.
-
The Balance Type field defaults to All Balances, but you can filter by Primary Loan, for example.
- The Payment Type field defaults to All Payments, but you can apply the payment to a side note or make a principal only payment, for example.
- If applicable, click View Other Balances to view more specific information.
- The Action Type field system-fills with Take a Payment, but you can choose Waive Late Fees Only if applicable.
- Complete the Delivery Method field.
- In the Payment Form field, choose the EPS option.
The EPS Account field and Add button ![]() appear.
appear.
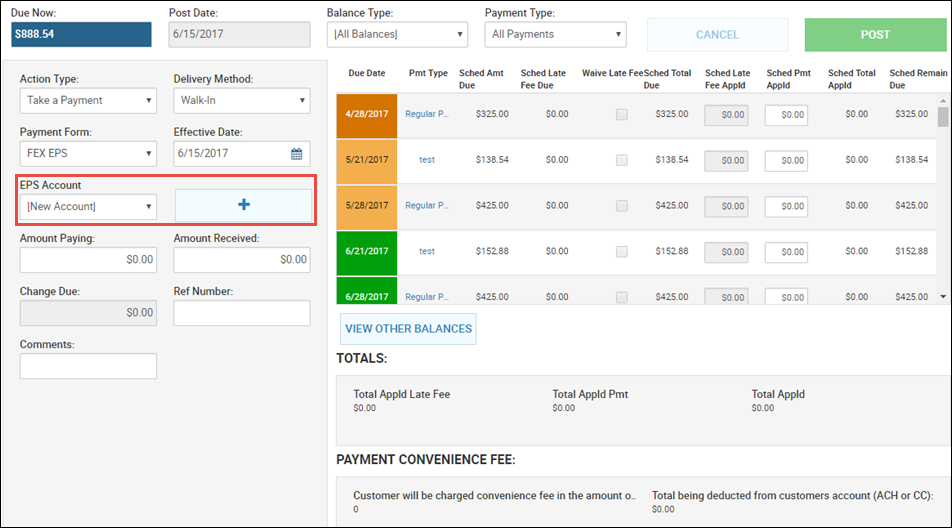
- Choose the Effective Date.
- Choose the EPS account, and go to Step 10.
OR
- Click Add
 to add a new EPS account.
New fields appear.
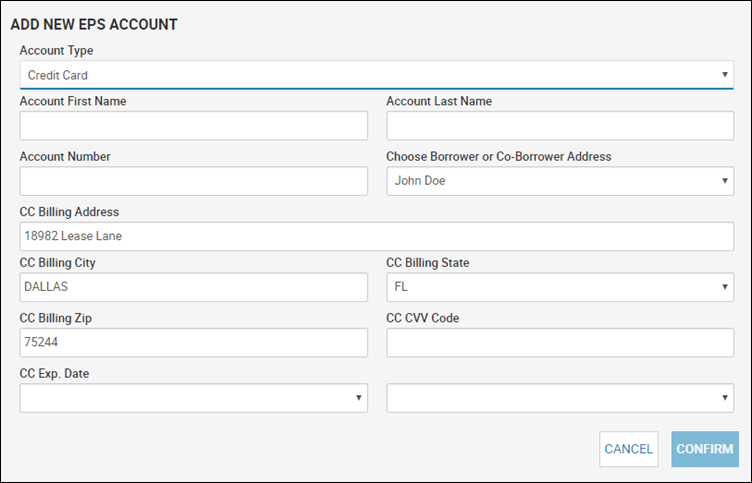
- Complete the account fields, and click Confirm.
You return to the previous fields. The system auto-fills the EPS Account field with the new account.
- Complete the amount, reference, and comments fields.
-
The Sched Pmt Appld column sytem-fills. You can override the way the payment is applied.
-
Click Post.
You can view, print, or email a receipt, or you can post another payment before closing the bottom navigation bar.
